Saturday, June 25, 2011

return on creativity: lil' tree tote bag


Here's how to make this cute lil' appliqued tote bag.

1.  Cut six 11 inch by 14 inch rectangles of fabric; two from the outer bag fabric, two from the lining fabric, and two from Craft Fuse interfacing.

2.  Iron the Craft Fuse interfacing to the wrong side of the outer bag fabric rectangles.  (I first used Craft Fuse on my ruffled sunglass case and I like the weight it adds to fabric for bags.  However, this step is optional.)

3.  Trace a tree truck onto the paper side of Wonder Under fusible web.  I've provided my tree trunk drawing below.


4.  Iron the Wonder Under onto the wrong side of the fabric you would like to use for the tree trunk.


5.  Cut out the tree trunk, peel off the paper backing, and iron onto the right side of one of the outer bag rectangles of fabric.


6.  Using a straight stitch sew the trunk to the fabric staying close to the edge.  (Take your time and go slow.)


7.  Iron Wonder Under onto the wrong side of the fabric you want to use for the tree circles.  Trace circles onto the paper side and cut out.  My circles have a 1.75 inch diameter.


8.  Remove the paper backing from the circles and iron onto the tree.


9.  Using a zig zag stitch sew around the circles.  Go slow and turn the fabric as you sew.  You may need to stop from time to time and turn the fabric without sewing to make a tight turn (always with your needle in the down position holding the fabric in place).


10.  I'm not sure what this stuff is called (below), but I cut two seventeen inch lengths for straps and sewed the ends to the right sides of the outer fabric two inches in from the side of the bag.  Use a quarter inch seam allowance.  Match the raw edges of the fabric and the straps together.


11.  Put the right sides of the outer fabric together and sew three side together with a half inch seam allowance.  Leave the top open.  Repeat with the two lining fabric rectangles.

12.  Turn the outer bag right side out and place inside the lining fabric.  Sew around the top of the bag with right sides of the fabric facing each other.  Leave a three inch opening.


13.  Pull the outer bag through the opening and turn the lining inside.  Top stitch around the top of the bag sewing the opening closed.  I top stitched another row of stitches about a quarter inch below the first.

14.  Enjoy your bag!

Thursday, June 23, 2011

drawing class: sketches in the park

Over the weekend I slapped on a beret and headed outside to sketch.  OK, no beret, but doesn't it seem like that's something one should wear when sketching in a park?


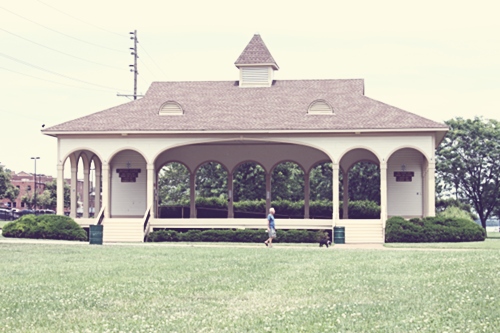
Here's a picture of the park grandstand.


And here's my sketch.


A picture of a train car in the park.


And my sketch.

After two sketches my bottom was getting a little soggy as the wet grass was seeping through my blanket.  There is a fabulous train depot in the park that I would love to sketch as well on another day.

Our latest lesson in class was on perspective.  I'm really looking forward to learning shading.  The class is a lot of fun, but two four hour long classes a week really makes me tired!  Going to school in the evening was so much easier when I was younger!

Tuesday, June 21, 2011

work in progress: painting kitchen cabinets

My summer project is to make my kitchen more cute.  So far I made kitchen curtains and hung some fabric flowers.  My latest upgrade is painting the kitchen cabinets.  


Actually this project was delegated to my husband who is on summer break.  He did a wonderful job, with one exception...when I asked him to take a "before" picture for my blog this is what I got:


So I don't have a before shot of the whole kitchen, but this should give you an idea of what we were dealing with.

Tony used a Rust-oleum cabinet painting kit that we saw at Home Depot.  Tony had no complaints with the product beyond the normal it's-sure-a-pain-in-the-butt-to-paint-kitchen-cabinet gripes.  It's a multi step process that takes some time, but the results look great.  Our color is called federal grey.


While we were at it, we changed out our pulls too.  We reused our knobs.  I have always loved the look of these "bin style" pulls.  I think it looks really nice with the grey.  These were also purchased at Home Depot.  They are part of the Martha Stewart collection.


Here's a look at the other side of the kitchen.  I just love it.  Overall the kitchen is looks brighter and more fresh.  Our cabinets were really starting to show some wear and tear and we aren't planning to replace them for a few years.  I will be curious to see how this paint job holds up.

Next stop is accessories!!!

Sunday, June 19, 2011

me: a special birthday present


I feel so lucky and blessed.  My husband gave be the 11 inch mac book air for my birthday on Saturday. I've wanted it for so long, but it is hard for me to spend extravagantly on myself.  


I've never owned a Mac before.  I think the only time I ever used one was if all the PCs where taken in the computer lab on campus in college.  

I have so much to learn.  Plus I have to download all my favorite fonts, get used to new photo editing software, and figure out how to use this tiny thing. (I used GIMP to edit the photo above.)

So far I just love it for its lightness and small footprint.  

I am calling all Mac users...please share with me your cool Mac tools, tips, and tricks!!

Wednesday, June 15, 2011

drawing class: first homework assignment

My first homework for class was to draw two still life pictures a day in my sketch book.

These are all in pencil.  In class we learned a technique where you hold up a dowel rod to measure angles between items and then draw the angle on the paper as reference points while sketching.  It's the strangest thing but it works!  When I start a drawing based on these angles it seems all wrong, but as I keep measuring and sketching and tweaking and moving it things all miraculously works out in the end. 

Here are some of my better sketches.  (I'll show my fails on another day.)


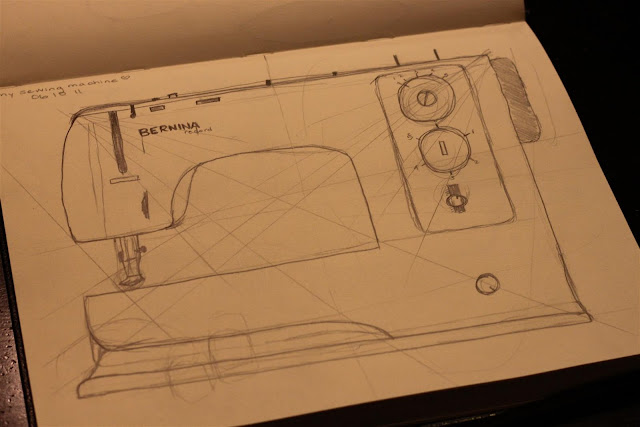
This looks surprisingly like my real sewing machine.


random stuff on my crafting table


more random crafting supplies


kitchen chair

Tuesday, June 14, 2011

another take: retrohipmama vintage camera embroidery


I love seeing other people's takes on my tutorials.  Didn't retrohipmama do a great job on her vintage camera embroidery?  I just love that she "signed" it.  I am definitely going to start incorporating this into my embroideries.

I'm so jealous of her crafting area (so much better than my crafting dungeon in the unfinished basement).

And check out her most recent post about Project Life (which is a really neat scrapbooking project...but I'll let you check out retrohipmama's blog to read all about it.)

You can find my vintage camera embroidery tutorials here:

vintage camera embroidery no.1
vintage camera embroidery no.2
vintage camera embroidery no.3

You can upload pictures of a crafty cpa inspired project to my flickr group.

Thursday, June 9, 2011

work in progress: kitchen window part 2

After I made new curtains for my kitchen window, I felt like it still needed a couple things.  My idea was to make a "valance" out of fabric flower garland.  I found some great tutorials here and here.  Somehow during the creative process I ended up with hanging flowers instead.


To make the flowers, first cut out a lot of fabric circles.  There are about thirty circles in each flower.  My grey flowers were a bit smaller and made of circles with a 3.5 inch diameter.  The yellow and blue flowers are larger and made of circles with a 4 inch diameter.


Fold each circle in half.


Then hold into thirds like an accordion.


Use a needle and thread to thread the circles together.  Pierce the needle through the point and thread all circles together.


Pull circles tight together and tie thread together.  Fluff out your flower a bit.  With this many circles the flower actually becomes more of a ball.


Hang your circle flowers all over the house!

Tuesday, June 7, 2011

me: the first drawing class

I went to my first drawing class last night.  Here are my first impressions:

  • I easily had a good ten years on every student in the class.  I may be the same age as the instructor.  Since I didn't have time to stop home after work I was there in my work clothes.  Everyone else was wearing shorts and tank tops and flip flops.  You could almost hear the tune "One of These Things is not Like the Other" start playing when I walked in the room.

  • We spent about thirty minutes reviewing the attendance policy.  It seems like when I was in college they were just making the change from "you are adults and you only hurt yourself if you miss class" toward grading on things like attendance and participation.  I am a little nervous about being tardy as class starts at 6 and I have to travel through some major rush hour traffic to get there.  The student next to me didn't bring a pen or pencil to class.  I had to fish one out of my purse to lend.  I hate to pre-judge, but I think he might have issues with the attendance policy.

  • Our supplies list is amazingly long.  I feel bad for all the kids because I know it will be expensive.  Maybe since we don't have to buy a book the supplies will shake out to be the same cost.  I know I would be shocked at the prices of books these days.

  • We didn't do any drawing the first night, but we did watch our instructor draw as he described some techniques.  It made me feel more intimidated to draw in class.  I think I will feel nervous until I start putting pencil to paper.  I envisioned us drawing while sitting at tables, but we will be drawing on easels.  Interesting.

My next class is Wednesday night.  I can't wait to start drawing!!!

Sunday, June 5, 2011

return on creativity: ruffled sunglass case


Ever since my sunglass case fell apart I've gotten into a bad habit of throwing my sunglasses in my car's cup holder.  This is not the best way to treat expensive prescription sunglasses.  So I decided to sew myself a simple sunglass case.

I was inspired by this gathered clutch tutorial by Noodlehead to add some ruffles to my case.

How to make it:

1.  Cut two 9 inch by 5 inch rectangles of fabric from the outer fabric and two 9 inch by 5 inch rectangles of fabric from the lining fabric.  Cut two 4 inch by 12 inch rectangles of fabric for the ruffles.  I used a neutral linen for the outer fabric and the same light blue cotton fabric for the ruffles and the lining.

2.  Cut two 9 inch by 5 inch rectangles of Craft Fuse interfacing and iron onto the wrong side of outer fabric.  This will add some weight and stability to the sunglass case.

3.  Fold both raw edges of the ruffle fabric into the center and iron flat. 


4.  Pin ruffles into place on the right side of the outer fabric.  The bottom edge of the ruffle should be about 2 1/2 inches from the bottom edge of the outer fabric. 


5.  Top stitch ruffles into place.  I used red thread and stitched the ruffles down in three places.  Make sure you sew over the ruffles in the right direction so that they don't catch on the sewing machine presser foot.


6.  Put right sides of outer rectangles together and sew on three sides, leaving the top open.  Do the same with the lining fabric.


7.  Turn the outer case right side out and stitch an elastic band to the top seam on the right side of the fabric.


8.  Place the outer case inside the lining, right sides together and sew along the top leaving a two inch opening.

9.  Pull the outer case through the opening and turn the lining into the sunglass case.  Top stitch around the top of the case sewing the opening closed.


10.  Stitch a button on the front of the case to catch the elastic band and secure the case closed.  I used a button from my vintage button stash.


Related Posts Plugin for WordPress, Blogger...